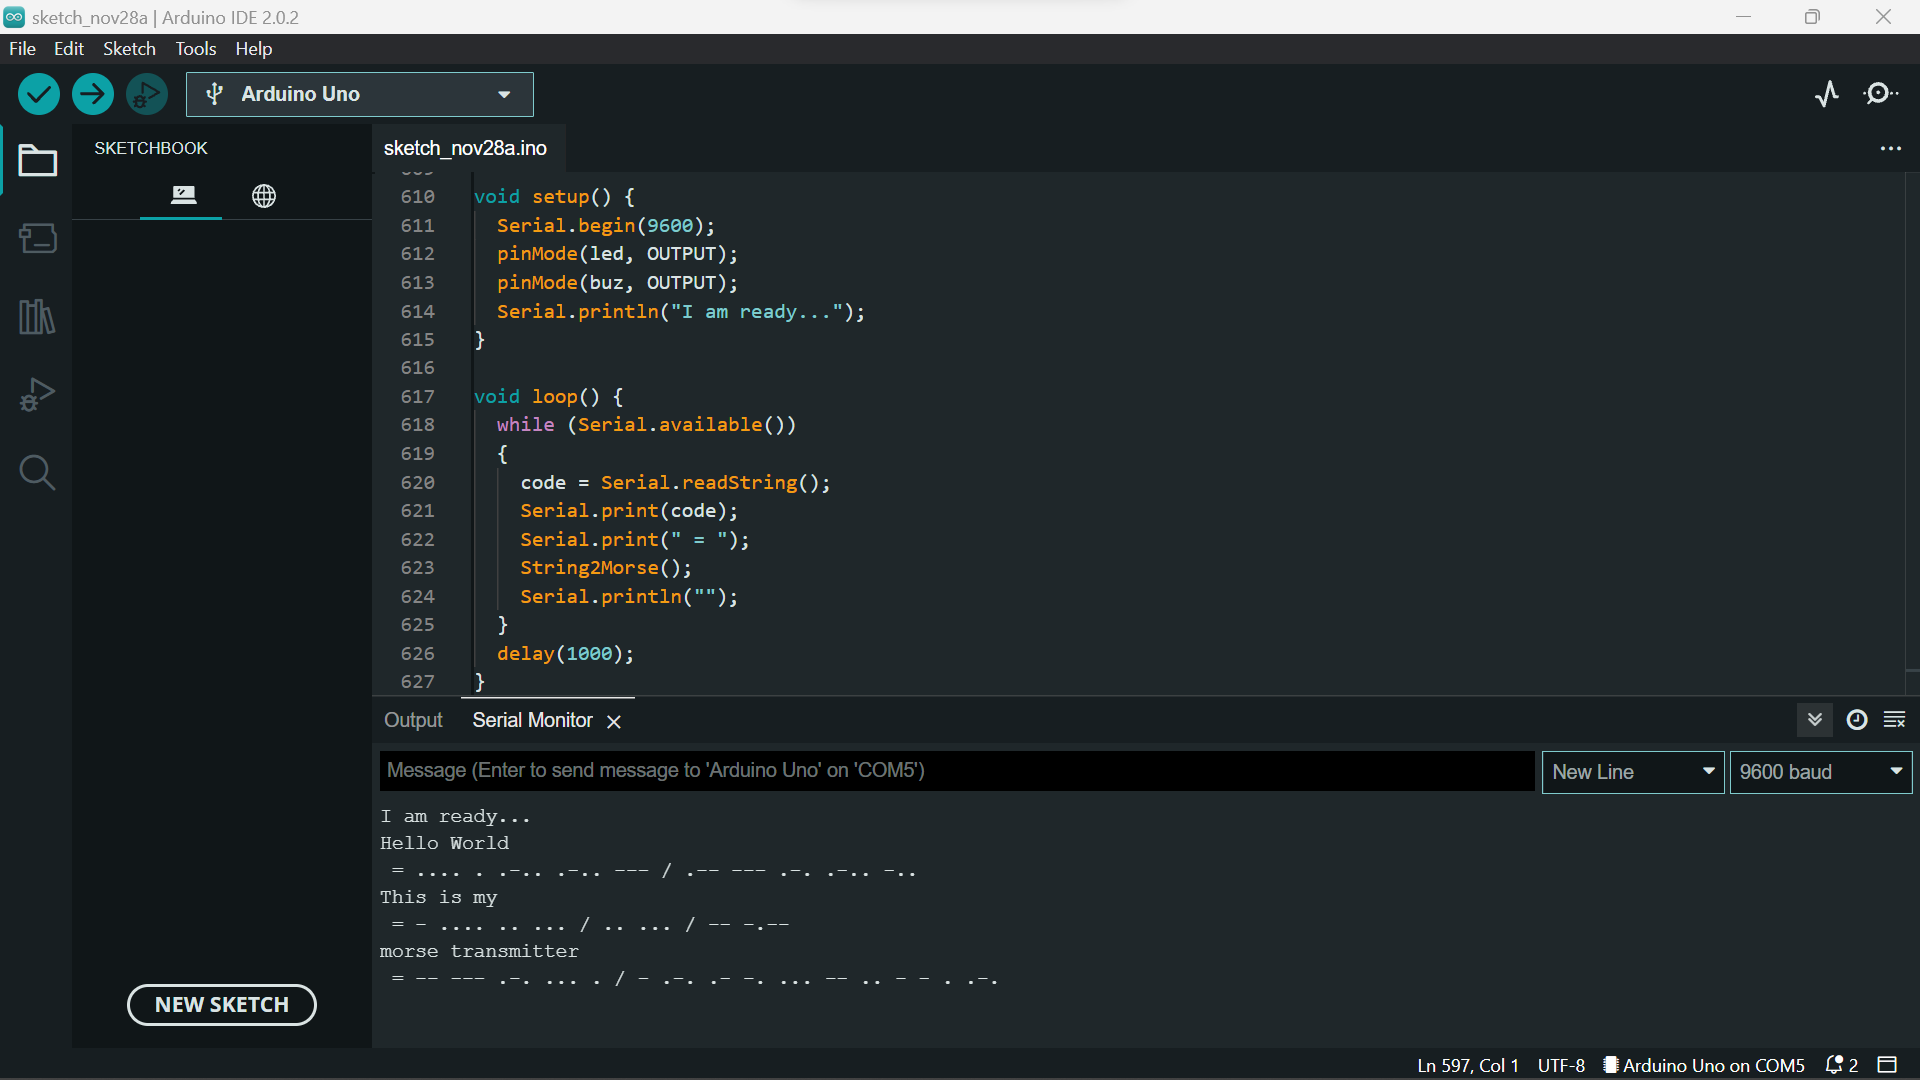
For a beginner Arduino-based project, I decided to make a morse code transmitter/translator that would take a string input of letters and numbers in the Arduino IDE serial monitor and translate the text into morse code. This project’s main purpose was to apply what I’ve learned on coding in C++ and apply it to an embedded system such as an Arduino microcontroller. It was an opportunity to apply my coding knowledge while introducing myself to an Arduino Circuit.
Initial intent aside, an encoded message transmitter is both fun and useful in its own ways. Morse code was a famous method of some of the first long distance communication, and its rich history has shown its uses in early radio communication as well as secret messages during war. The code itself was relatively simple, hence its popularity: characters from the english alphabet and numbers zero through nine would each be represented by a unique permutation of dots and dashes. These dots and dashes are then relayed over long distances by radio and similar signal technology to a receiver that will typically hear or see some form of said dots and dashes. Its widespread use has created a few variants, however, so I decided to go with the international code for the best flexibility.

International Morse Code Matrix (Wikipedia)
The biggest challenge of this project was the coding. While the logic of the code was relatively straightforward, I wanted to make sure the program was easy to navigate and easy to debug should there be any mistakes or unforeseen issues. I decided to achieve this by creating separate functions for both dot and dash, each printing the translated code on the serial monitor while also relaying a signal to the microcontroller to trigger an LED as a visual transmission of the message. I also made functions of each character to ensure easy fixes for a mistranslation or easy editing should a user wish to use a different Morse code. Here is an example for the letter ‘C’:
void C()
{
  dash();
  delay(unit_delay);
  dot();
  delay(unit_delay);
  dash();
  delay(unit_delay);
  dot();
  delay(unit_delay);
}
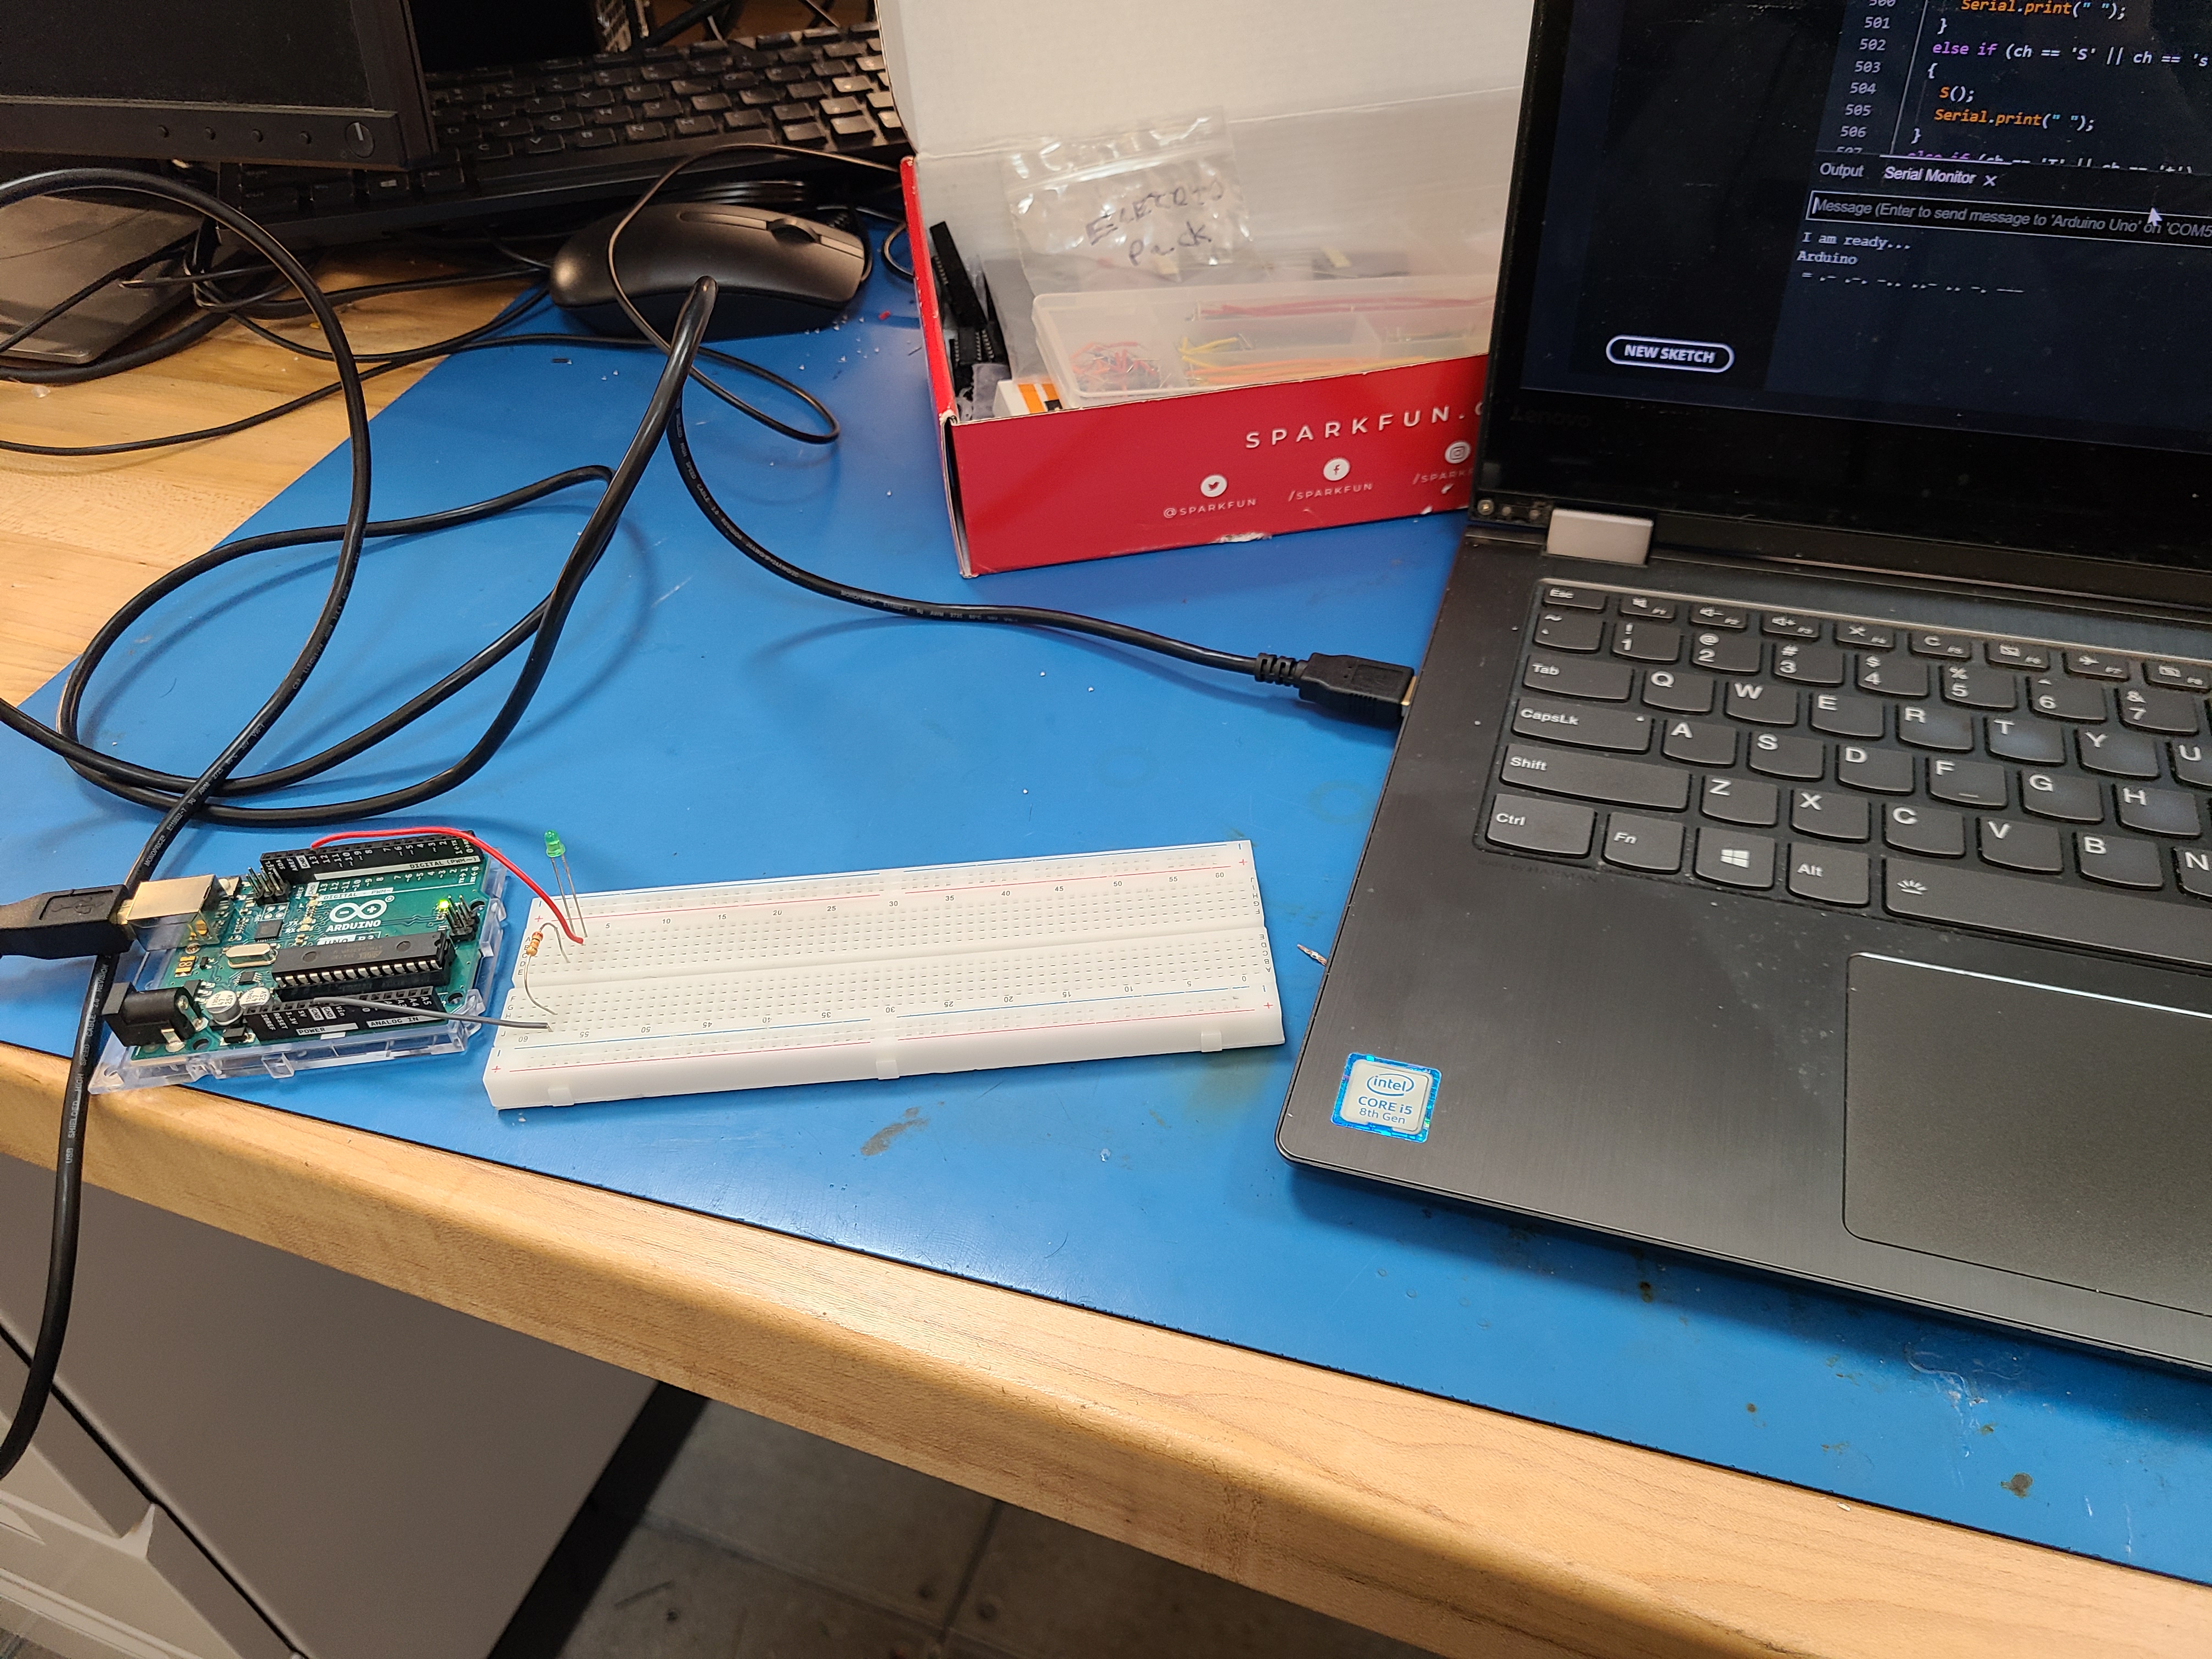
As for the physical circuit, it was a simple but effective LED circuit attached to an Arduino UNO.
If desired, using a separate signal and ground pin, the circuit can support a buzzer from other Arduino kits to provide both a visual and audio transmission of the input. The dots and dashes were controlled by using built-in Arduino functions to stretch or cut the length of time that the LED was turned on.
Ultimately, This project was a fun and insightful process of figuring out how to optimize code and use Arduinos as microcontrollers. The coding helped me improve and polish what I already knew, and having experience building even an easy circuit gives me the confidence to expand and progress. For the future, I do want to continue this project by building off what I’ve learned about Arduino functions and creating a decoder that can receive a message from the first program and retranslate it back into english. This is currently in progress until further updates.